
WordPress is a free and open-source content management system written in PHP and paired with a MySQL or MariaDB database. You can use it to publish a blog or even an ecommerce website. In order for your readers or clients to be able to see your website or blog, you need to host it somewhere. There are lots of hosting services around. There is also a way to have it hosted for free for one year, and after that year, the hosting costs will be relatively low.
You can use Google Cloud Platform to create a WordPress web solution, which is basically a virtual machine instance with a WordPress solution including apache server, a mysql server, php, phpmyadmin and some other tools already pre-loaded. Google Cloud Platform as well as AWS and Azure provide a free tier during 1 year. The condition for the service to be free is that you need to use resources that are included in the free tier of the offering.
In this post we are taking a look at the procedure to host a WordPress webpage by leveraging the free tier offering in Google Cloud.
The high level steps are:
– Create a free account in Google Cloud Platform
– Create a project and within it a create a WordPress web application solution
– Assign a Domain Name to the site
– Enable SSL to make the website secure
Here are the detailed steps:
1.- Create a Free Account in cloud.google.com
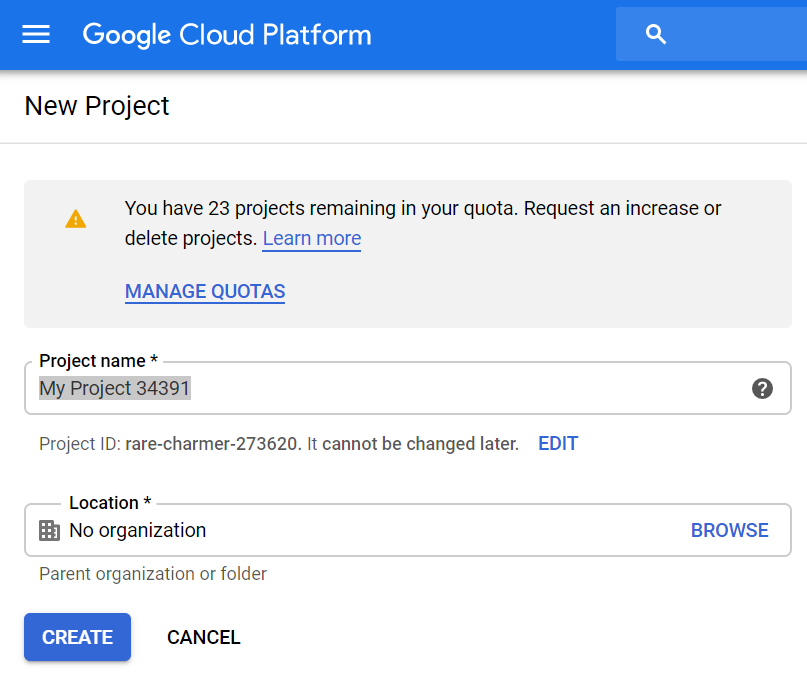
2.- Create a new project and create a web application solution.
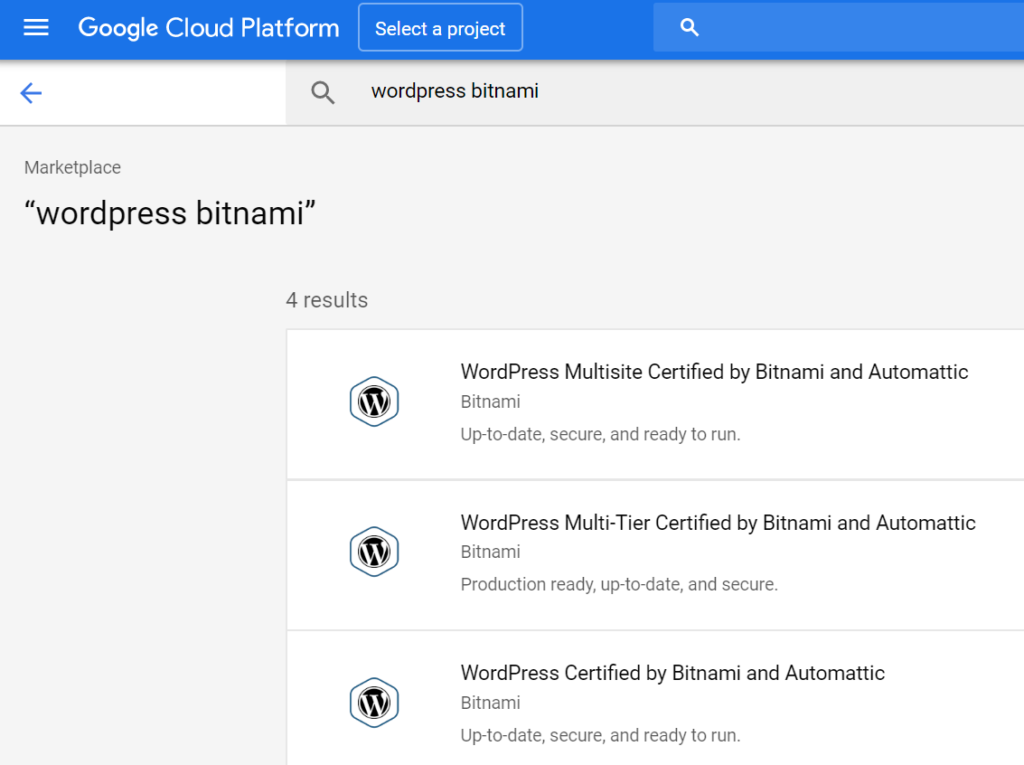
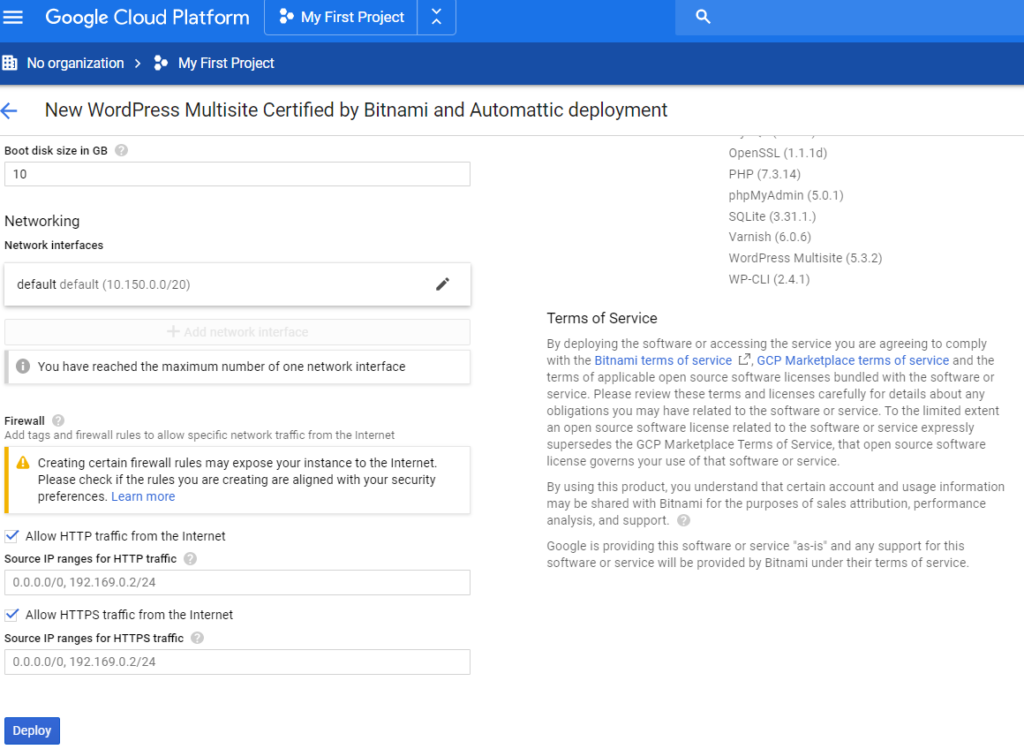
In Marketplace look for WordPress Bitnami. I choose the Multisite option in case I want to create multiple blogs or sites in a single server.
Give it a name, for the zone, choose one a zone in either in us-west1 , us-central1 or us-east1 , and for machine type chose f1-micro so that it is still free. For disk leave the default values.
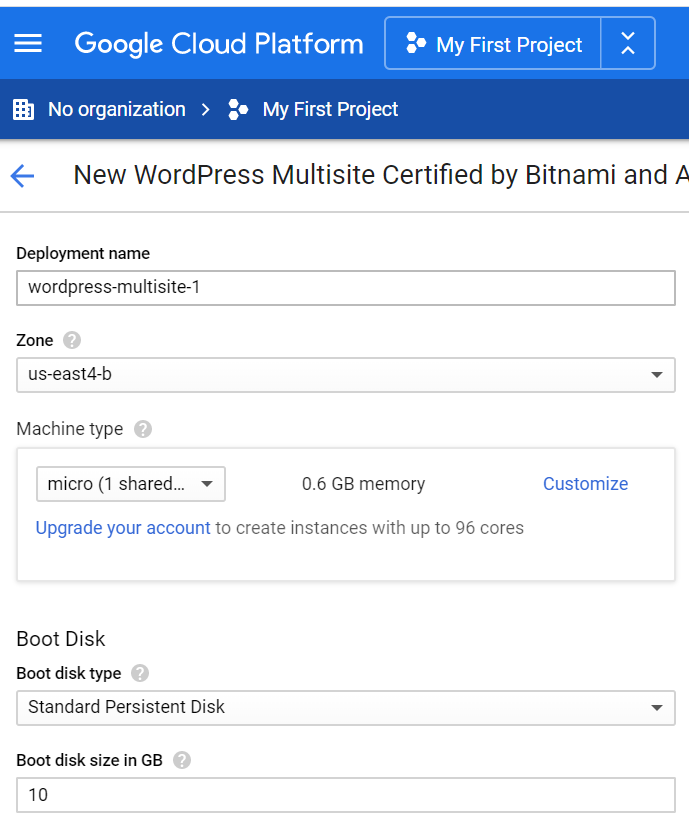
Leave the default settings for Networking. For Firewall, allow HTTP and HTTPS traffic.
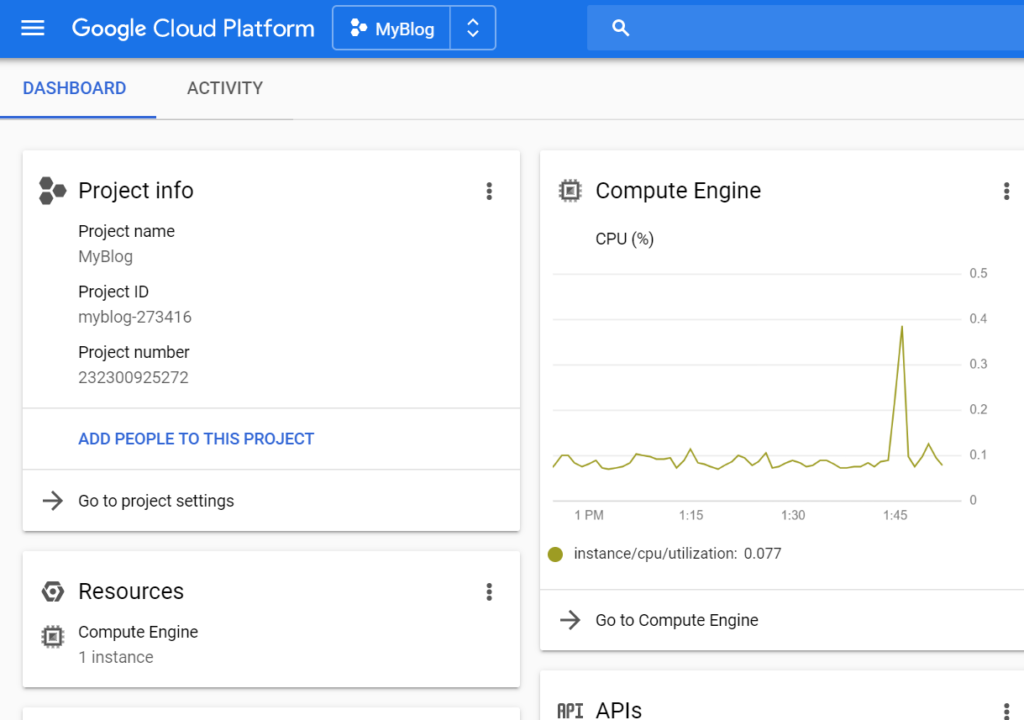
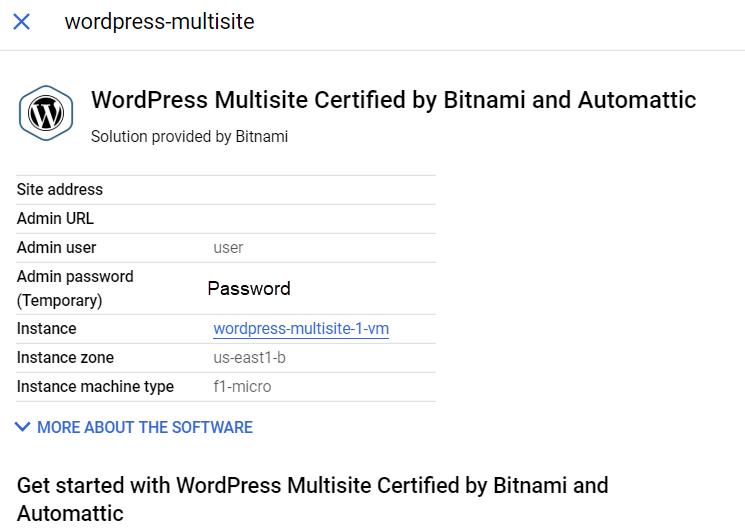
Once configured, you can see the WordPress Multisite Site Address, Admin URL, user and password by navigating to Deployment Manager and selecting the deployment you have just created. You can click the Admin URL link (not shown below), to start configuring your WordPress Website. If you click the Site address you will be able to see the Website as any other user would.
Here you can start customizing the WordPress website, but that is part of another discussion. In this post we are going to discuss some other steps that need to be done as far as domain name, security, and others.
3.- Assign a domain name to the site.
So far we can navigate to this website by IP Address only. To assign an URL to it, we need to first get a domain. A cheap way to get a domain name is by using https://www.namecheap.com/ .
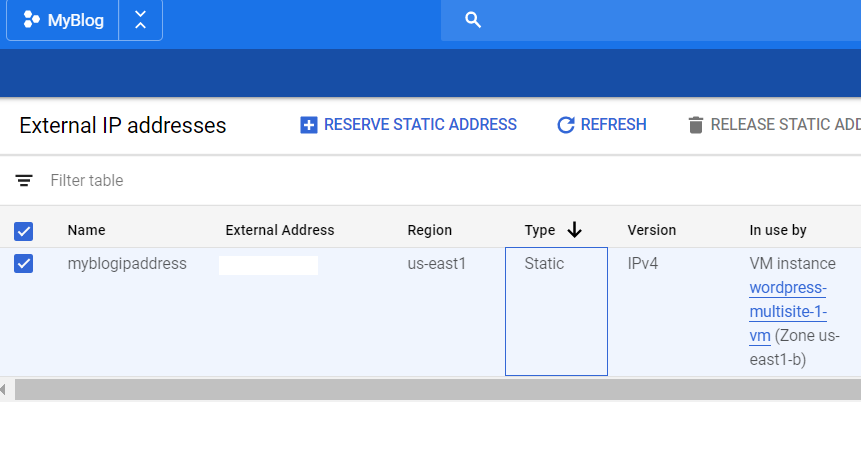
Before going ahead, our IP Address is still not static. To change it to static we need to get to External IP Address and on Type, change the type from Ephemeral to Static.
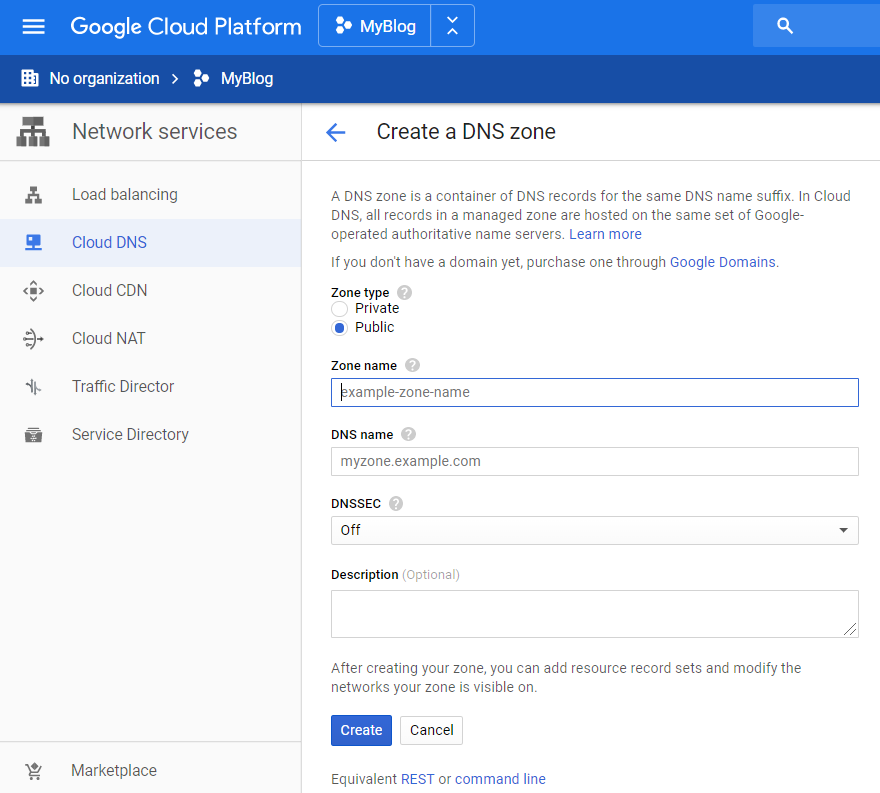
Once we have acquired a domain name and have a Static IP Address, we need to configure DNS settings in Google Cloud. We need navigate to Cloud DNS and create a new DNS Zone. We need to configure it as Public, provide any name, provide a DNS name (the one just acquired) and hit create.
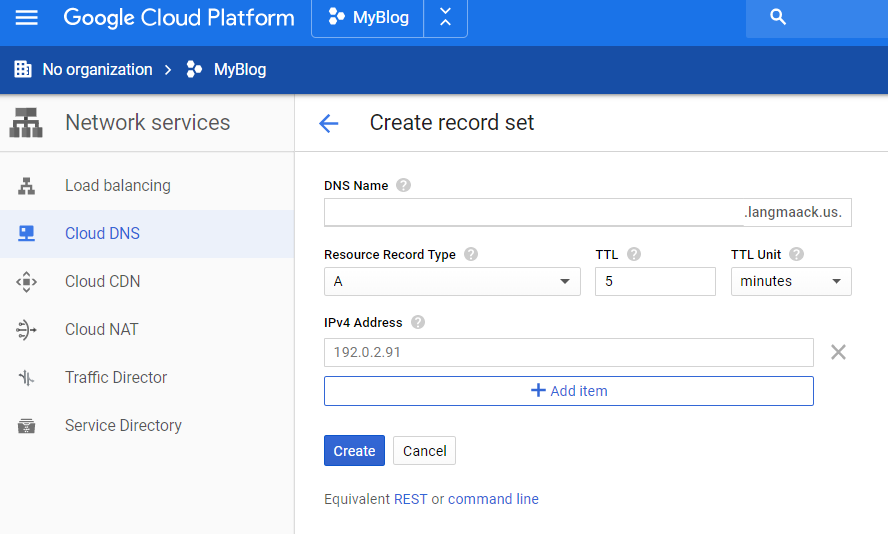
After that, in the DNS Zone we just created, we now need to add a record set. The first one will be an A record. Here we leave the DNS Name as it is (like domain.com). For the IPv4 Address you need to provide the IP Address that google assigned to the virtual machine you just created.
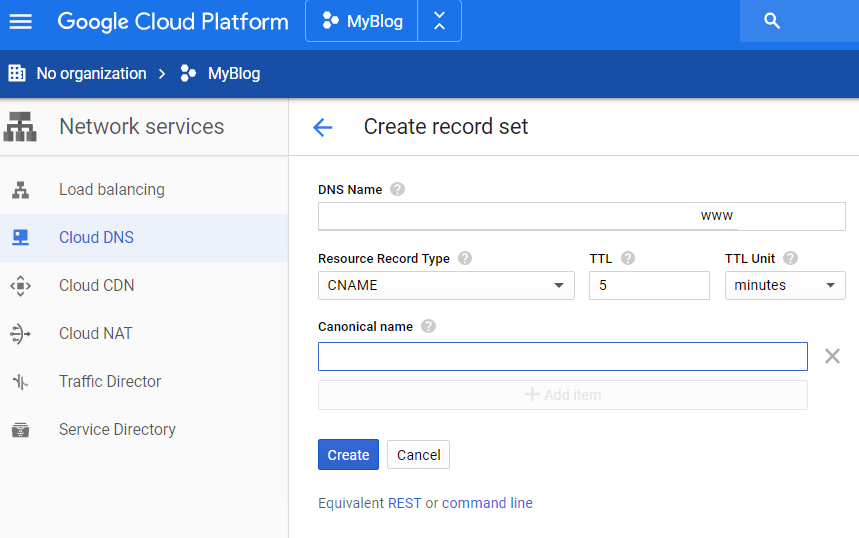
Then we need to create another record for www.domain.com. This time this record should be a CNAME Record type. For Canonical name this should be domain.com
Now we need to look at the NS Registars in the DNS Zone.
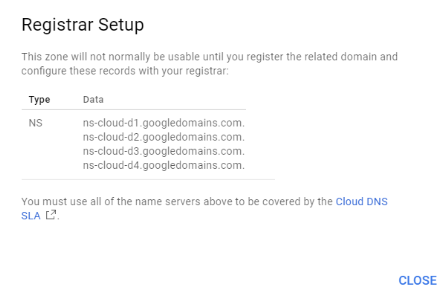
Copy the four entries and paste them in your domain manager NameServers list.
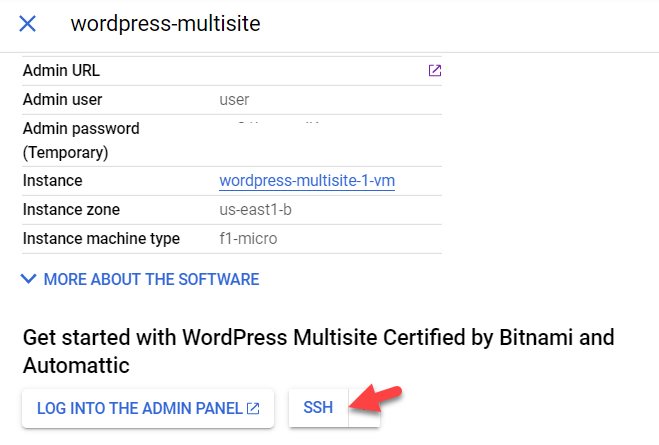
Now go back to Google Cloud Deployment Manager, look for your WordPress deployment, and click on SSH to connect via SSH to the Virtual Machine.
In the ssh session, do the following:
cd /opt/bitnami/apps/wordpress
sudo ./bnconfig --machine_hostname <domain.com>
sudo mv bnconfig bnconfig.disabled

Now in your Web Browser, you can navigate to yourdomain.com and you will be able to see your WordPress website.
4.- Add SSL to make it secure
Continue in the SSH session to the virtual machine, and execute the following command (replace yourdomain with your real domain and your real email address). Answer “Y” to all prompts:
sudo /opt/bitnami/letsencrypt/scripts/generate-certificate.sh -m <your-email-address> -d <yourdomain>.com -d www.<yourdomain>.com
Then open the following file in vi (or nano):
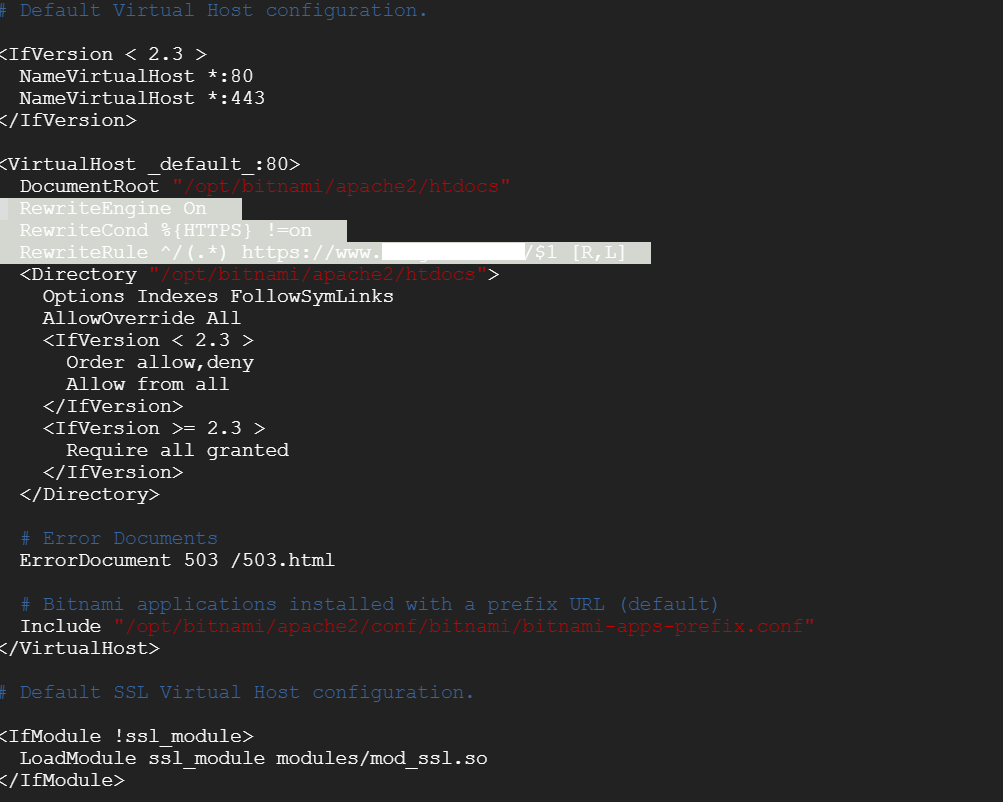
sudo vi /opt/bitnami/apache2/conf/bitnami/bitnami.conf
… and add the following lines in the section shown in the image below.
RewriteEngine On
RewriteCond %{HTTPS} !=on
RewriteRule ^/(.*) https://www.yourdomain.com/$1 [R,L]
Now restart the apache service:
sudo /opt/bitnami/ctlscript.sh restart apache
After this if you navigate to your page, you will see that the connection is now secure.
5.- Remove the Bitnami Banner
You will notice that there is a Bitnami Banner like this one in the lower right corner of the webpage:

To remove it, execute the following commands in an SSH session in the Virtual Machine:
cd /opt/bitnami/apps/wordpress/conf
Edit the following file:
sudo vi httpd-app.conf
Find the following line:
Include "/opt/bitnami/apps/wordpress/conf/banner.conf"
Comment it:
#Include "/opt/bitnami/apps/wordpress/conf/banner.conf"
Save the file and restart the apache service:
 sudo /opt/bitnami/ctlscript.sh restart apache
At this point we have a fully functional WordPress website that is totally free at least for one year.